
Project Clothing
Project Clothing is completely optional for your hentai experience, and it's almost definitely the most complicated thing you'd have to set up if you want everything this guide provides. But I highly recommend it because it brings a lot to the proverbial table.
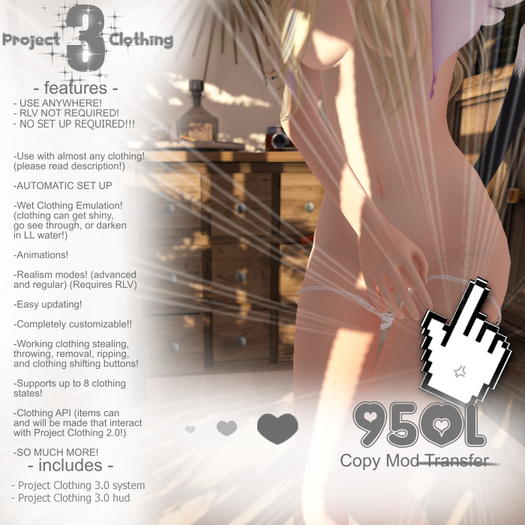
Project Clothing brings the following features;
- Allows you to set up clothing that can be stolen, thrown, or destroyed.
- Stolen clothing can be retrieved by catching the thief.
- Thrown clothing will rezz as physical items you'll need to pick up to wear the clothing again.
- Watch out! Others can pick up your tossed clothing and run off or hide it from you!
- Allows you to set up attachments and wearables your avatar will automatically wear when the clothing is removed. (Such as genitals.)
- Allows you to set up attachments and wearables your avatar will automatically wear when the clothing is worn. (Perfect for items such as "squished boob" mods for tight shirts.)
- Animations for wearing/removing clothing.
- Project Monster interactivity. Project Monster creatures will toss off or destroy some of your clothing when they catch you! The longer they have you, the more you lose!
- Particles, sound effects, and animations for all of the above.
Again, let's first take a look at what comes in the box.
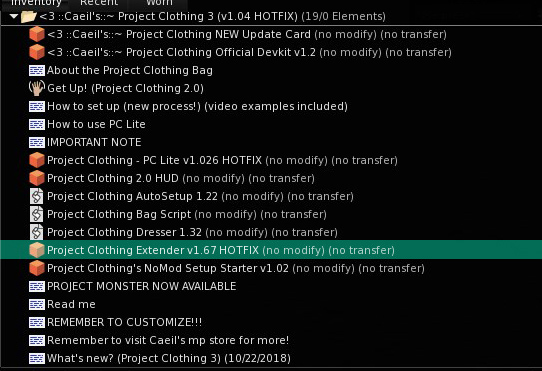
And again, I've highlighted the first thing you need to look at. The Project Clothing Extender is the system object that makes all other features work. You can wear this as its own attachment, or you can link it to another attachment, such as the Project Arousal system attachment, to save yourself an attachment slot. And, believe me, when wearing all of the PA attachments and other HUDs we'll be going over, you'll want to save all the attachment slots you can. So I totally recommend linking it to the PA system attachment.
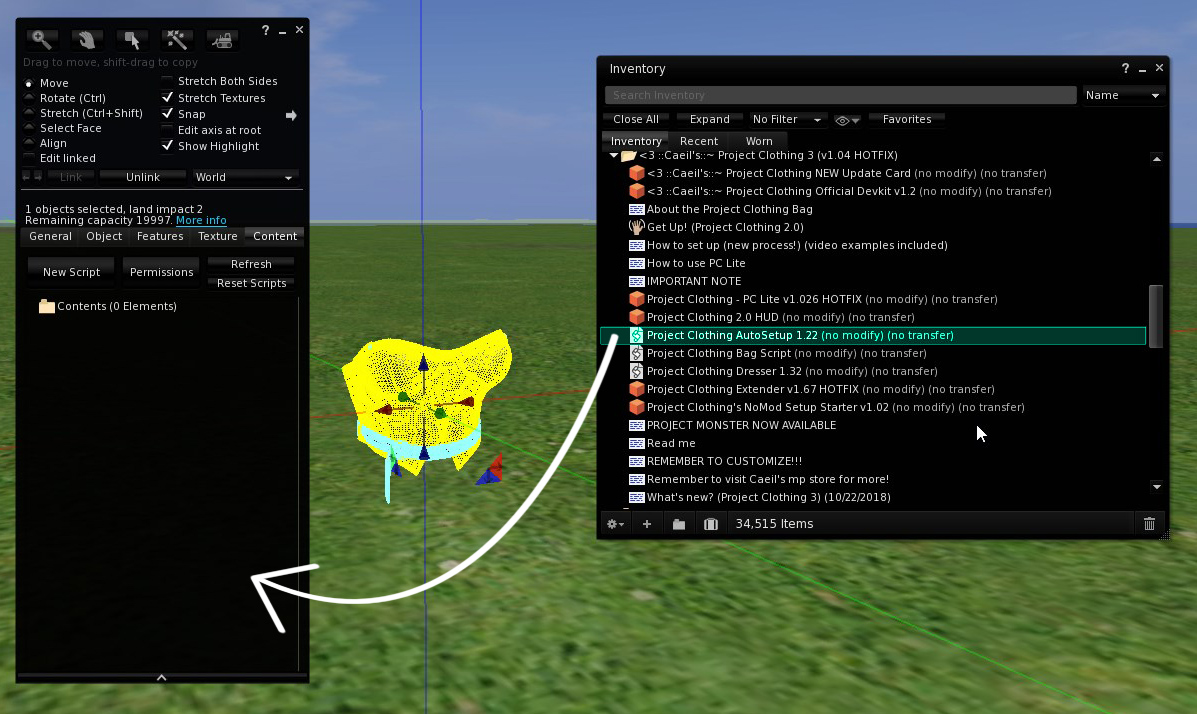
Next, let's set up some clothing. Now, you don't need to make all of your clothes into PC attachments. Only the ones you want to make removable. Let's start simple and help Sveid here make her top and skirt into Project Clothing attachments. As you can see, this step is pretty simple. All you do is
- Rez the clothing item on the ground. If the clothing requires multiple attachments only rez the main item.
- Select your clothing item.
- From your Project Clothing folder, drag the "AutoSetup" script (highlighted in the above screenshot) into your clothing item.
- Select the appropriate settings in the menus that follow.
Obviously this means you need clothing that is modifiable, there's an option for no-mod clothing too but it will double the number of attachments you need to wear so I recommend sticking with modifiable clothing. There's no reason for clothing to be no-mod anyway. Support creators that aren't paranoid assholes who don't know how SL works.
These menus you'll start to get are super easy and straightforward, but I'll run through them real quick.
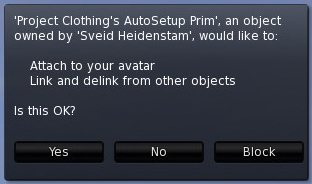
The first menu just asks for permission to attach objects to your avatar, so it can attach the clothing to your avatar during the course of the setup. Obviously you want that. And it also asks if it can link/unlink pieces of an object. This is so it can unlink any unneeded objects, such as the root prims so many stores attach to their clothing for no reason, and so it can attach the Project Clothing object as the new root. Again, this is necessary so click yes.

This second menu asks if the item is rigged or unrigged. If the clothing is rigged, then any unrigged pieces are unnecessary. If the attachment is unrigged, then the script can't tell what's necessary and what's not, so it won't try to remove anything.
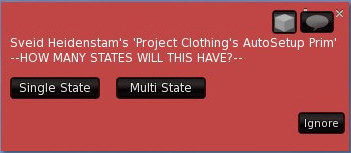
The third menu asks about states. Most clothing is single state. Multi-state refers to clothing that has features like the ability to be zipped/unzipped. Or a shirt that can be lifted or pulled down. Setting that up is more complicated than I want to deal with in this guide so we'll keep it simple and assume all your clothing is single-state. If you feel ambitious, I recommend joining the Caeil support group for help with setting up multi-state clothing.
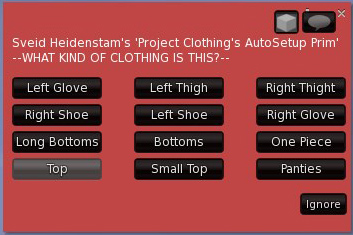
Menu 4 is obvious, just choose the type of clothing this is. The type of clothing determines where the attachment will be attached, and what sort of animations will be used to wear/remove the clothing.
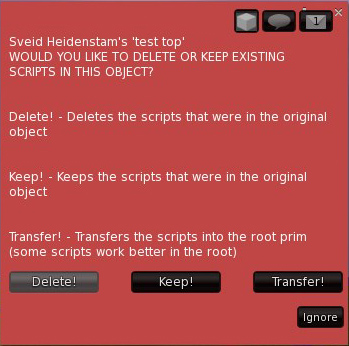
This one might be less obvious, but the fifth menu wants to know if you want to keep or delete existing scripts in the clothing. If the scripts are only texture change or resize scripts or something like that, it's best to delete them. However, some scripts will auto-hide parts of your body so they don't clip through the clothes. If that's the case, keep the scripts intact.
Remember how the script wanted to detach any unneccessary prims from your rigged clothing? Those prims will be sitting on the ground wherever you're doing all this. This final menu just asks if you want to automatically delete them.
Ok, so now you're done, right? Well, not quite. A lot of clothing requires you to wear or detach other items along with it. Such as an alpha mask, or a body mod attachment. Project Clothing uses RLV folders to handle all these extras for you, automatically. So when, say for example, your shirt is removed, PC will automatically attach your nipple piercings. And you set this up using a notecard that has been added to your newly scripted clothing. First, let me show you how to set up the folders.
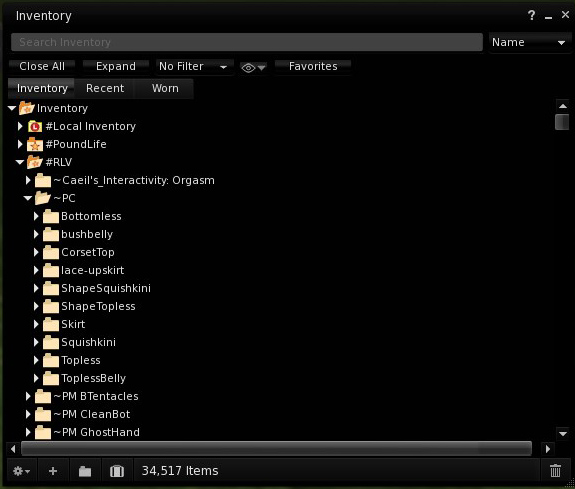
If you're using Firestorm or most any other Third Party Viewer (that is, any Viewer released by someone other than Linden Lab) then you should already have an #RLV folder already in your inventory. To keep things organized, I like to create a folder named ~PC inside the #RLV folder, and I place all of my Project Clothing subfolders inside the ~PC folder.
For this top, we're going to need two folders. One folder will hold items worn with the clothing. The other folder will be items detached when the clothing is worn, and re-attached when the clothing is removed.
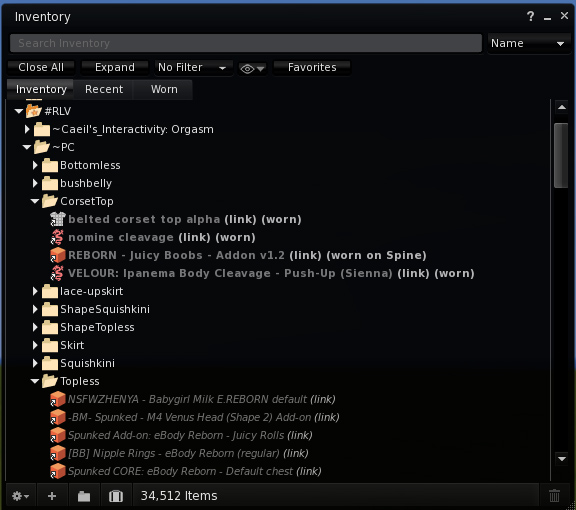
As you can see in the image above we've created a folder named CorsetTop and a folder named Topless. Inside the CorsetTop folder I've placed every item that needs to be worn with the clothing. In this case it's the alpha mask, the Reborn "Juicy Boobs" addon, and some shading/highlights that compliment the Juicy Boobs. You should only ever use links. This will save you a lot of headaches later. To make a link all you need to do is select the item you want in the RLV folder, click "copy" and then in the destination folder select "paste as link".
And, of course, in the Topless folder I've placed everything that should be worn when the clothing is removed. In this case I've set it up so when I'm topless it will attach my nipple rings, a lactation add-on, and my Spunked interactive cum attachments. (No need to wear those all the time.)
Now that our folders are set up, we need to edit our clothing once more, this time when you peek inside the contents of your clothing you should see something like this.

Look at that! Project Clothing has added some contents to our clothing! Open the ecchisettings notecard! And before we get to adding the RLV folders to our settings, stop here, near the top, where it asks if the clothing can fall off.

This defaults to "Auto", which decided if it can fall off based on the type of clothing you chose when setting it up. But if you want more control over what clothing can fall off, you can set this to Yes or No. Since it wouldn't make sense for a tight leather corset with a belt around it to just pop off, I chose No here. But maybe you've stuffed your oversized breasts into a tight bikini that struggles to hold them in, in which case you might want to choose Yes. If the clothing can fall off this means every time you bump into someone or something, there is a chance of that clothing coming off! Wardrobe malfunctions can be a great ice breaker.
Once you've taken care of that it's time to scroll down further until you reach the RLV section of the notecard.
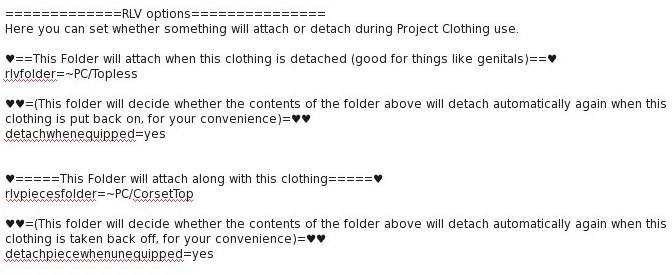
These first four settings under RLV Options are what we're looking for. As you can see here I've added my Topless and CorsetTop folders to the appropriate lines and set "yes" to the attach/detach options. Now when I wear this clothing, my nude bits will automatically remove themselves, and the items I need to wear with the clothing will attach automatically.
And with that, our top is now set up for Project Clothing! Follow the same steps with your other clothes and you'll be all set to be stripped by everyone with grabby hands that you come across. If you don't want that, simply wear the included HUD in your Project Clothing folder and from there you can choose if your clothes can be removed/destroyed. Perfect for if you need to run into a G rated sim for whatever reason.
There are other options as well. You can blacklist annoying people from being able to interact with your clothes. You can set what happens to your clothes when they get wet. All that and more are a bit beyond what I want to cover here, but if you're eager to learn more, join the creator, Caeil's, help group to ask any questions you might have.
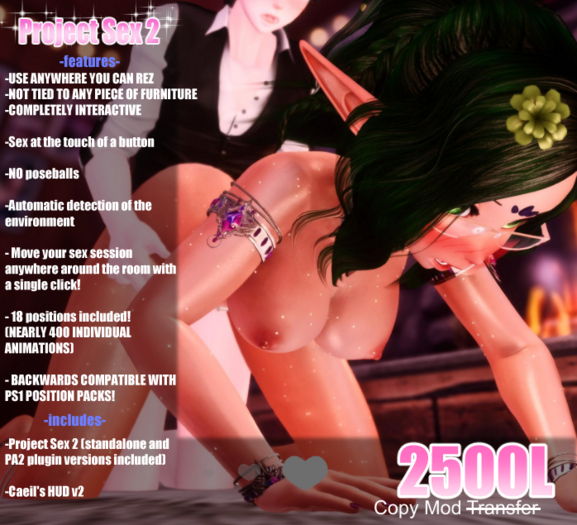
| Project Clothing 3 | Project Sex 2 |
 |
 |
 |
 |
 |
 |